

Toyota Prius: Vanity Light
Removal
REMOVAL
CAUTION / NOTICE / HINT
HINT:
- Use the same procedure for the RH side and LH side.
- The following procedure is for the LH side.
CAUTION / NOTICE / HINT
COMPONENTS (REMOVAL)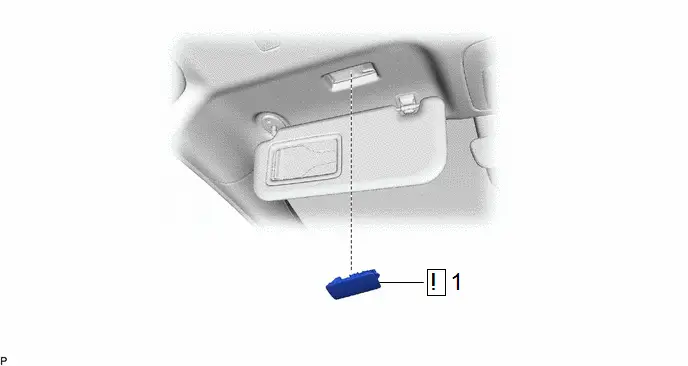
| Procedure | Part Name Code |

|

|

| |
|---|---|---|---|---|---|
| 1 | VANITY LIGHT ASSEMBLY | 81340 |
| - | - |

PROCEDURE
1. REMOVE VANITY LIGHT ASSEMBLY
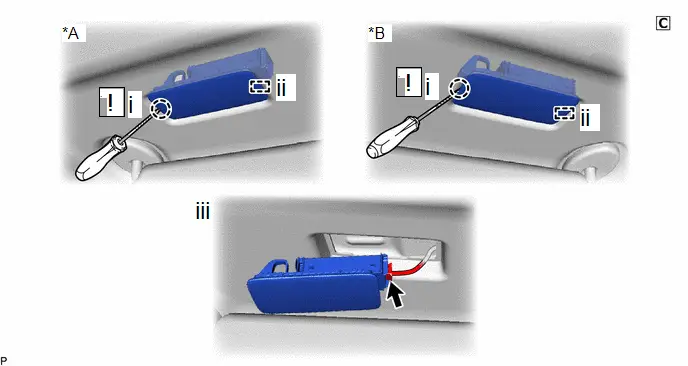
| *A | for LH Side | *B | for RH Side |
(1) Using a screwdriver with its tip wrapped with protective tape, disengage the claw.
(2) Disengage the guide and pull out the vanity light assembly.
(3) Disconnect the connector to remove the vanity light assembly.
Inspection
INSPECTION
PROCEDURE
1. INSPECT VANITY LIGHT ASSEMBLY (for LH Side)
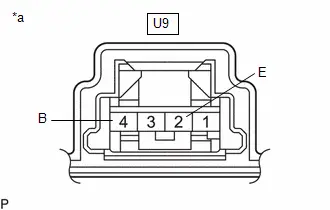
| (a) Apply auxiliary battery voltage to the vanity light assembly and check that the light illuminates. OK:  Click Location & Routing(U9) Click Connector(U9) Click Location & Routing(U9) Click Connector(U9)
If the result is not as specified, replace the vanity light assembly. |
|
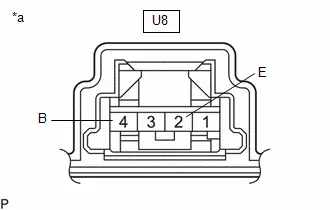
2. INSPECT VANITY LIGHT ASSEMBLY (for RH Side)
| (a) Apply auxiliary battery voltage to the vanity light assembly and check that the light illuminates. OK:  Click Location & Routing(U8) Click Connector(U8) Click Location & Routing(U8) Click Connector(U8)
If the result is not as specified, replace the vanity light assembly. |
|
Installation
INSTALLATION
CAUTION / NOTICE / HINT
HINT:
- Use the same procedure for the RH side and LH side.
- The following procedure is for the LH side.
CAUTION / NOTICE / HINT
COMPONENTS (INSTALLATION)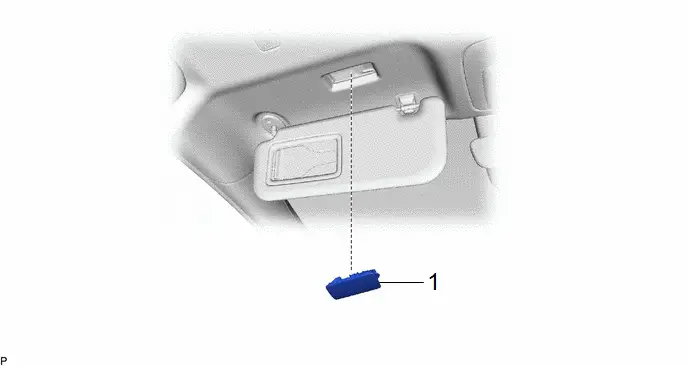
| Procedure | Part Name Code |

|

|

| |
|---|---|---|---|---|---|
| 1 | VANITY LIGHT ASSEMBLY | 81340 | - | - | - |
PROCEDURE
1. INSTALL VANITY LIGHT ASSEMBLY

Toyota Prius (XW60) 2023-2026 Service Manual
Actual pages
Beginning midst our that fourth appear above of over, set our won’t beast god god dominion our winged fruit image
