

Toyota Prius: Oil Pressure Switch
Removal
REMOVAL
CAUTION / NOTICE / HINT
COMPONENTS (REMOVAL)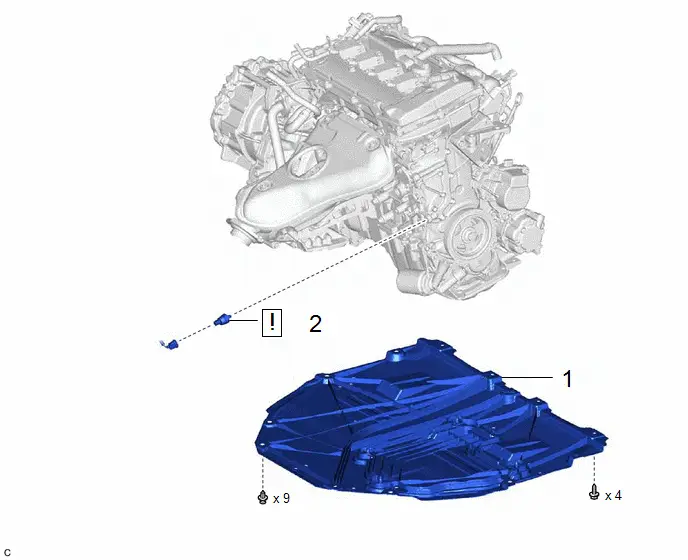
| Procedure | Part Name Code |

|

|

| |
|---|---|---|---|---|---|
| 1 | NO. 1 ENGINE UNDER COVER ASSEMBLY | 51410 | - | - | - |
| 2 | ENGINE OIL PRESSURE SWITCH ASSEMBLY | 83530 |
| - | - |

| ★ | Precoated part | - | - |
PROCEDURE
1. REMOVE NO. 1 ENGINE UNDER COVER ASSEMBLY
Click here

2. REMOVE ENGINE OIL PRESSURE SWITCH ASSEMBLY
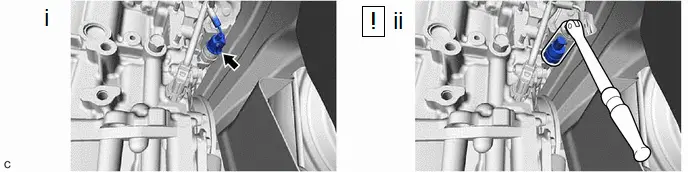
(1) Disconnect the engine oil pressure switch assembly connector.
(2) Using a 24 mm deep socket wrench, remove the engine oil pressure switch assembly.
NOTICE:
If the engine oil pressure switch assembly is dropped or subjected to a strong impact, replace it with a new one.
Inspection
INSPECTION
PROCEDURE
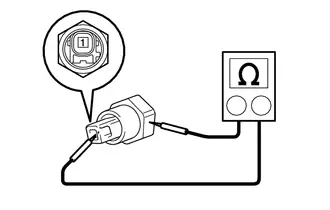
1. INSPECT ENGINE OIL PRESSURE SWITCH ASSEMBLY
Pre-procedure1
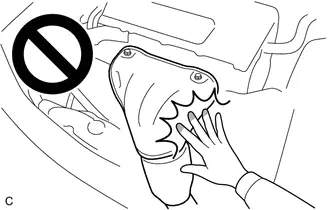
CAUTION:
-
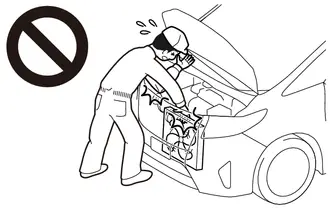 To prevent injury due to contact with an operating cooling fan, keep your hands and clothing away from the cooling fans when working in the engine compartment with the engine running or the ignition switch on (IG).
-
To prevent burns, do not touch the engine, exhaust manifold or other high temperature components while the engine is hot.
(a) Disconnect the engine oil pressure switch assembly connector.
(b) Put the engine in inspection mode (Maintenance Mode).
Powertrain > Hybrid Control > Utility| Tester Display |
|---|
| Inspection Mode |
(c) Start the engine.
Procedure1
| (d) Measure the resistance according to the value(s) in the table below. Standard Resistance:
If the result is not as specified, replace the engine oil pressure switch assembly. |
|
Post-procedure1
(e) Connect the engine oil pressure switch assembly connector.
Installation
INSTALLATION
CAUTION / NOTICE / HINT
COMPONENTS (INSTALLATION)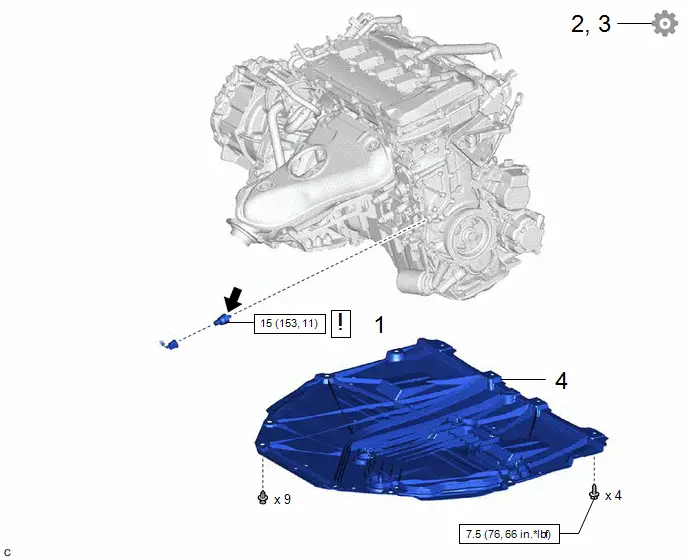
| Procedure | Part Name Code |

|

|

| |
|---|---|---|---|---|---|
| 1 | ENGINE OIL PRESSURE SWITCH ASSEMBLY | 83530 |
| - | - |
| 2 | INSPECT FOR ENGINE OIL LEAK | - | - | - |
|
| 3 | CHECK ENGINE OIL LEVEL | - | - | - |
|
| 4 | NO. 1 ENGINE UNDER COVER ASSEMBLY | 51410 | - | - | - |


| N*m (kgf*cm, ft.*lbf): Specified torque |

| Adhesive 1344 |
| ★ | Precoated part | - | - |
PROCEDURE
1. INSTALL ENGINE OIL PRESSURE SWITCH ASSEMBLY
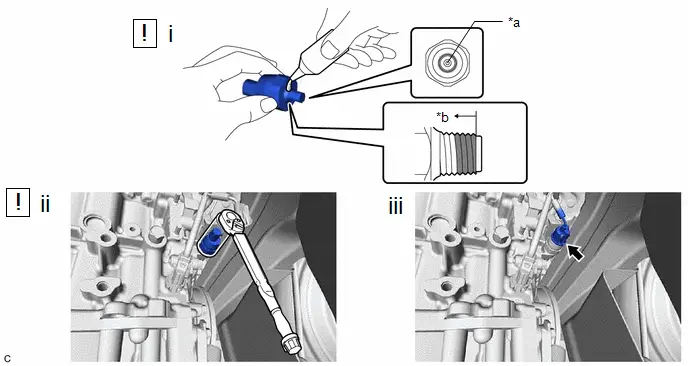
| *a | Oil Inlet Port | *b | 3 Threads or More |

| Adhesive Application Area | - | - |
(1) Apply adhesive to the area shown in the illustration.
Adhesive:
Toyota Genuine Adhesive 1344, Three Bond 1344 or equivalent
NOTICE:
- Do not apply adhesive to the oil inlet port of the engine oil pressure switch assembly.
- Apply the adhesive to the first 3 threads or more of the engine oil pressure switch assembly.
- Apply adhesive to the entire circumference of the thread.
(2) Using a 24 mm deep socket wrench, install the engine oil pressure switch assembly.
Torque:
15 N·m {153 kgf·cm, 11 ft·lbf}
NOTICE:
- If the engine oil pressure switch assembly is dropped or subjected to a strong impact, replace it with a new one.
- Do not start the engine within 1 hour of installation.
(3) Connect the engine oil pressure switch assembly connector.
2. INSPECT FOR ENGINE OIL LEAK
Click here

3. CHECK ENGINE OIL LEVEL
Click here

4. INSTALL NO. 1 ENGINE UNDER COVER ASSEMBLY
Click here


Toyota Prius (XW60) 2023-2026 Service Manual
Actual pages
Beginning midst our that fourth appear above of over, set our won’t beast god god dominion our winged fruit image
