

Toyota Prius: Front Evaporator Front Solenoid Valve
Removal
REMOVAL
CAUTION / NOTICE / HINT
The necessary procedures (adjustment, calibration, initialization or registration) that must be performed after parts are removed and installed, or replaced during No. 1 magnet valve assembly removal/installation are shown below.
Necessary Procedures After Parts Removed/Installed/Replaced| Replaced Part or Performed Procedure | Necessary Procedures | Effect/Inoperative Function When Necessary Procedures are not Performed | Link |
|---|---|---|---|
| *: Even when not replacing the part, it is necessary to perform the specified necessary procedures after installation. | |||
| Front bumper assembly* | Front television camera view adjustment | Panoramic View Monitor System |
|
| Advanced Park |
| ||


CAUTION / NOTICE / HINT
COMPONENTS (REMOVAL)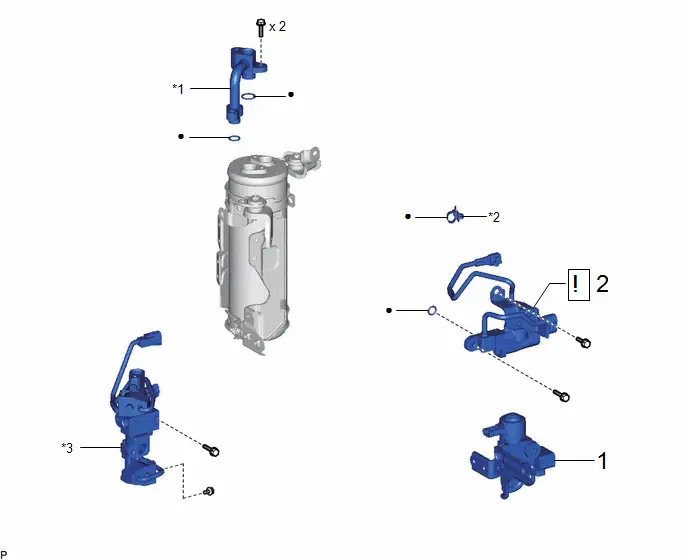
| Procedure | Part Name Code |

|

|

| |
|---|---|---|---|---|---|
| 1 | MAGNET VALVE ASSEMBLY | 88690K | - | - | - |
| 2 | NO. 1 MAGNET VALVE ASSEMBLY | 88690M |
| - | - |

| *1 | NO. 3 DISCHARGE TUBE | *2 | WIRING HARNESS CLAMP |
| *3 | MAGNET VALVE | - | - |
| ● | Non-reusable part | - | - |
PROCEDURE
1. REMOVE MAGNET VALVE ASSEMBLY
Click here

2. REMOVE NO. 1 MAGNET VALVE ASSEMBLY
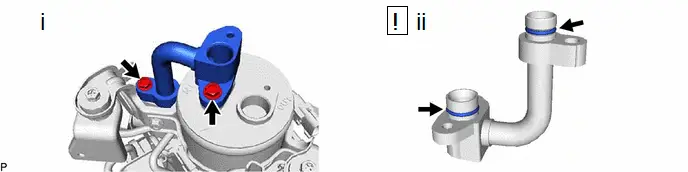
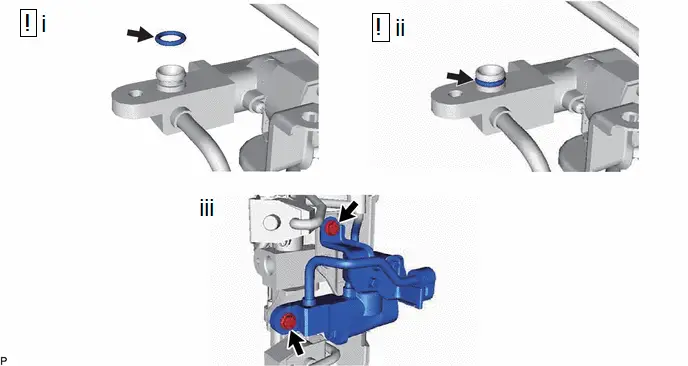
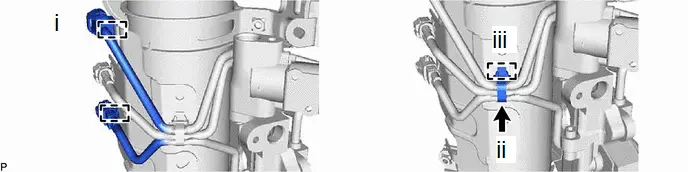
(1) Remove the 2 bolts and No. 3 discharge tube.
(2) Remove the 2 O-rings from the No. 3 discharge tube.
NOTICE:
Seal the openings of the removed parts using vinyl tape to prevent moisture and foreign matter from entering them.
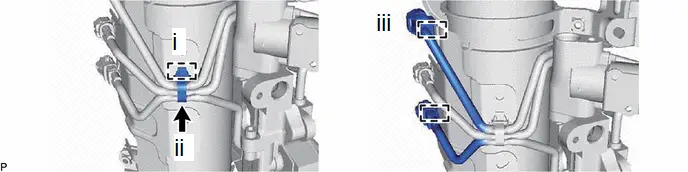
(1) Disengage the clamp.
(2) Cut and remove the wiring harness clamp.
(3) Disengage the 2 clamps.
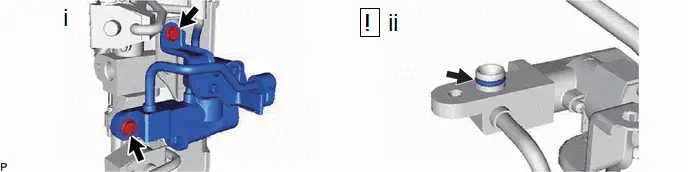
(1) Remove the 2 bolts and disconnect the No. 1 magnet valve assembly.
(2) Remove the O-ring from the No. 1 magnet valve assembly.
NOTICE:
Seal the openings of the removed parts using vinyl tape to prevent moisture and foreign matter from entering them.
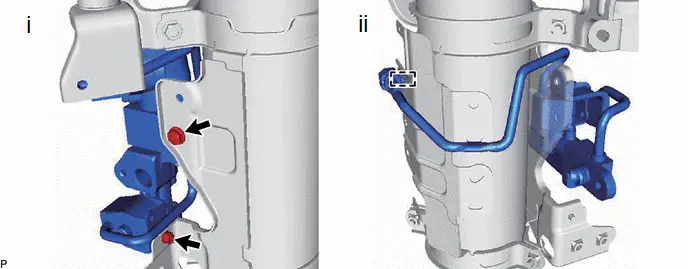
(1) Remove the 2 bolts and magnet valve.
(2) Disengage the clamp and No. 1 magnet valve assembly.
Inspection
INSPECTION
PROCEDURE
1. INSPECT NO. 1 MAGNET VALVE ASSEMBLY
(a) Apply auxiliary battery voltage to the terminals of the connector, and check the No. 1 magnet valve assembly operates.
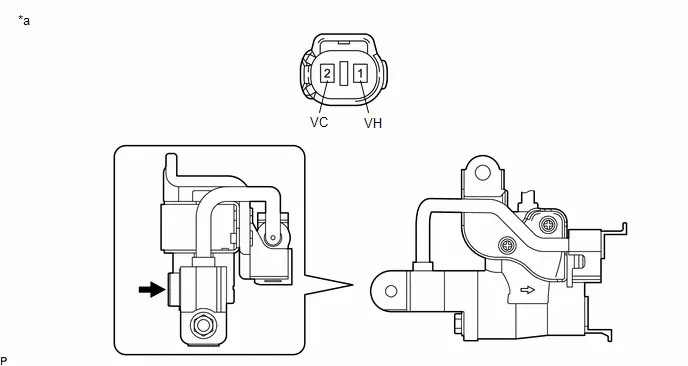
| *a | Component without harness connected (No. 1 Magnet Valve Assembly) | - | - |
OK:
| Tester Connection | Specified Condition |
|---|---|
| Auxiliary battery positive ( ) → 2 (VC) Auxiliary battery negative (-) → 1 (VH) | Apply compressed air to the air inlet and check that air not comes out from the air outlet. |
If the result is not as specified, replace the No. 1 magnet valve assembly.
Installation
INSTALLATION
CAUTION / NOTICE / HINT
COMPONENTS (INSTALLATION)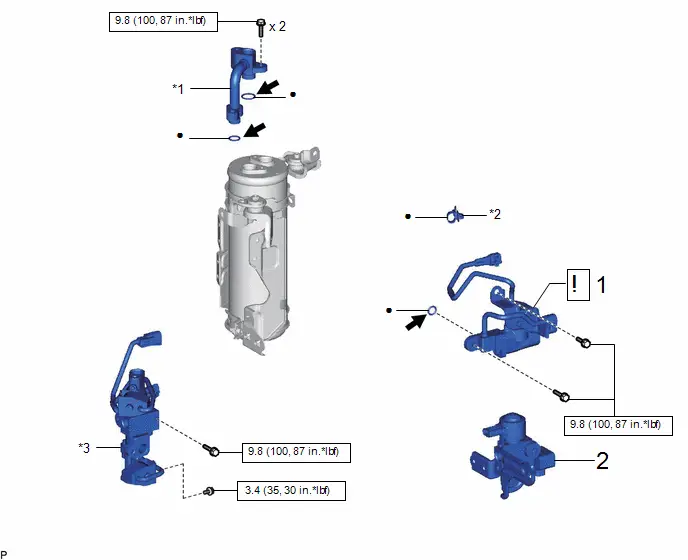
| Procedure | Part Name Code |

|

|

| |
|---|---|---|---|---|---|
| 1 | NO. 1 MAGNET VALVE ASSEMBLY | 88690M |
| - | - |
| 2 | MAGNET VALVE ASSEMBLY | 88690K | - | - | - |

| *1 | NO. 3 DISCHARGE TUBE | *2 | WIRING HARNESS CLAMP |
| *3 | MAGNET VALVE | - | - |

| N*m (kgf*cm, ft.*lbf): Specified torque | ● | Non-reusable part |

| Compressor oil ND-OIL 11 or equivalent | - | - |
PROCEDURE
1. INSTALL NO. 1 MAGNET VALVE ASSEMBLY
| *a | Bolt (A) | *b | Bolt (B) |
(1) Engage the clamp.
(2) Install the magnet valve with the 2 bolts.
Torque:
Bolt (A) :
9.8 N·m {100 kgf·cm, 87 in·lbf}
Bolt (B) :
3.4 N·m {35 kgf·cm, 30 in·lbf}
(1) Remove the vinyl tape, and sufficiently apply compressor oil to a new O-ring and the fitting surface of the No. 1 magnet valve assembly.
Compressor Oil:
ND-OIL 11 or equivalent
(2) Install the O-ring to the No. 1 magnet valve assembly.
NOTICE:
Keep the O-ring and O-ring fitting surface free of foreign matter.
(3) Install the No. 1 magnet valve assembly with the 2 bolts.
Torque:
9.8 N·m {100 kgf·cm, 87 in·lbf}
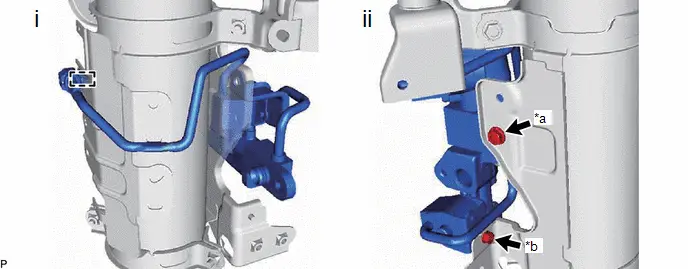
(1) Engage the 2 clamps.
(2) Install a new wiring harness clamp.
(3) Engage the clamp.
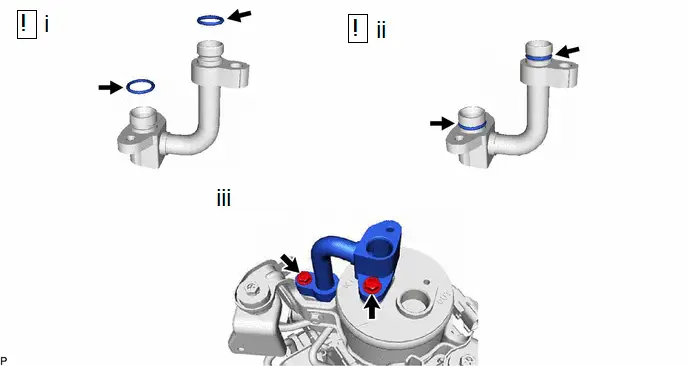
(1) Remove the vinyl tape, and sufficiently apply compressor oil to 2 new O-rings and the fitting surface of the No. 3 discharge tube.
Compressor Oil:
ND-OIL 11 or equivalent
(2) Install the 2 O-rings to the No. 3 discharge tube.
NOTICE:
Keep the O-ring and O-ring fitting surface free of foreign matter.
(3) Install the No. 3 discharge tube with the 2 bolts.
Torque:
9.8 N·m {100 kgf·cm, 87 in·lbf}
2. INSTALL MAGNET VALVE ASSEMBLY
Click here


Toyota Prius (XW60) 2023-2026 Service Manual
Front Evaporator Front Solenoid Valve
Actual pages
Beginning midst our that fourth appear above of over, set our won’t beast god god dominion our winged fruit image
