

Toyota Prius: Air Conditioning Amplifier
Removal
REMOVAL
CAUTION / NOTICE / HINT
COMPONENTS (REMOVAL)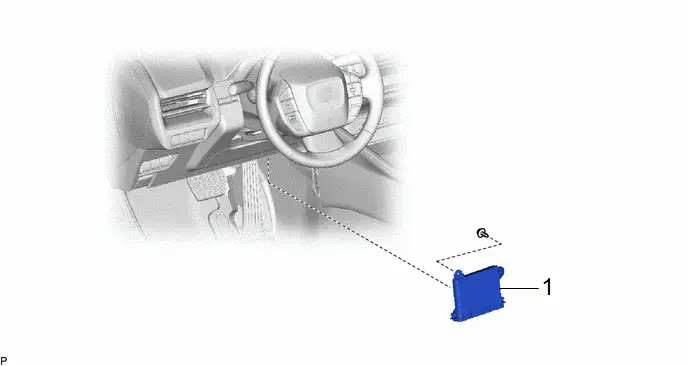
| Procedure | Part Name Code |

|

|

| |
|---|---|---|---|---|---|
| 1 | AIR CONDITIONING AMPLIFIER ASSEMBLY | 88650N | - | - | - |
PROCEDURE
1. REMOVE AIR CONDITIONING AMPLIFIER ASSEMBLY

| Remove in this Direction | - | - |
(b) for HEV Model:
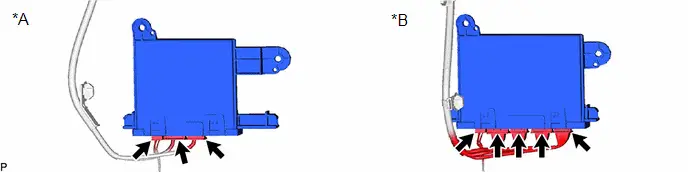
| *A | w/o Seat Heater System | *B | w/ Seat Heater System |
(c) for PHEV Model:

Installation
INSTALLATION
CAUTION / NOTICE / HINT
COMPONENTS (INSTALLATION)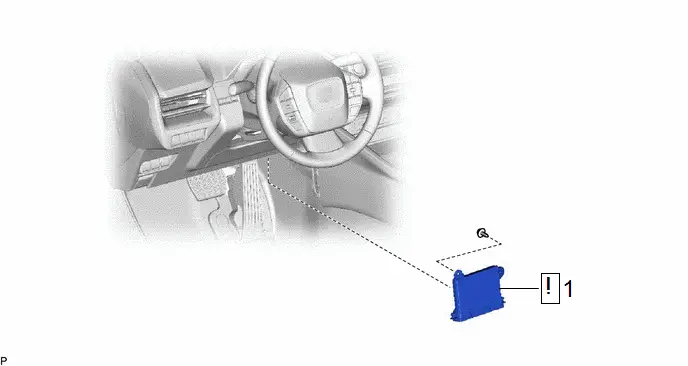
| Procedure | Part Name Code |

|

|

| |
|---|---|---|---|---|---|
| 1 | AIR CONDITIONING AMPLIFIER ASSEMBLY | 88650N |
| - | - |

PROCEDURE
1. INSTALL AIR CONDITIONING AMPLIFIER ASSEMBLY
(a) for HEV Model:

| *A | w/o Seat Heater System | *B | w/ Seat Heater System |
(1) Connect each connector.
(b) for PHEV Model:

(1) Connect each connector.
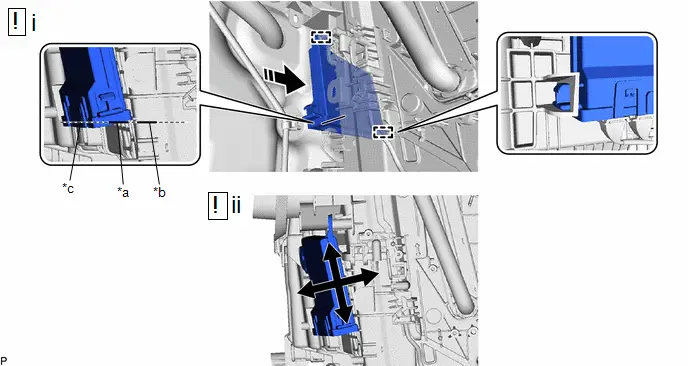
| *a | Lower Part of Air Conditioning Amplifier Assembly | *b | Rib of Air Conditioner Unit Assembly |
| *c | Align | - | - |

| Install in this Direction | - | - |
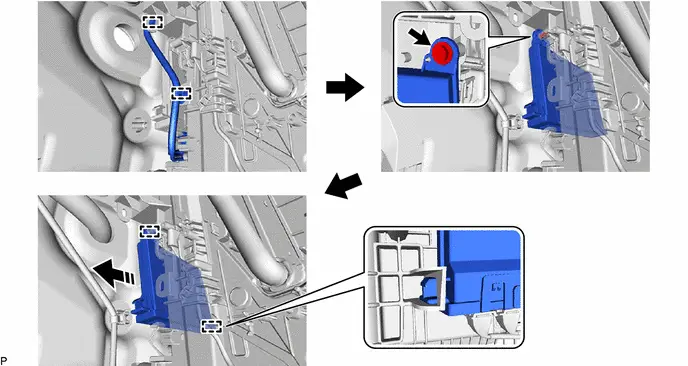
(1) Align the lower part of the air conditioning amplifier assembly with the rib of the air conditioner unit assembly and engage the 2 guides as shown in the illustration.
(2) Move the air conditioning amplifier assembly in each direction shown in the illustration to check that the guide is securely engaged.
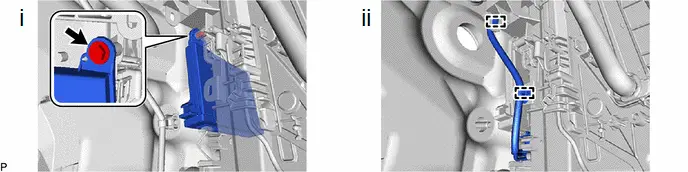
(1) Install the air conditioning amplifier assembly with the screw.
(2) Engage the 2 clamps.

Toyota Prius (XW60) 2023-2026 Service Manual
Actual pages
Beginning midst our that fourth appear above of over, set our won’t beast god god dominion our winged fruit image
