

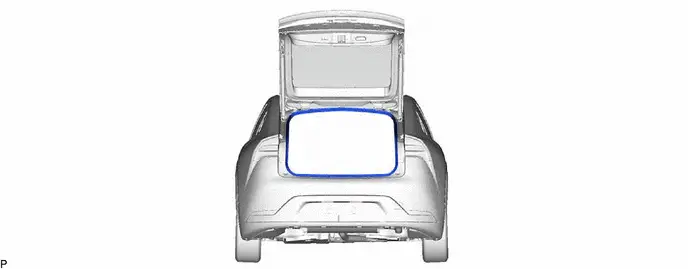
Toyota Prius: Back Door Weatherstrip
Removal
REMOVAL
CAUTION / NOTICE / HINT
COMPONENTS (REMOVAL)
| Procedure | Part Name Code |

|

|

| |
|---|---|---|---|---|---|
| 1 | BACK DOOR WEATHERSTRIP | 67881A | - | - | - |
| ● | Non-reusable part | - | - |
PROCEDURE
1. REMOVE BACK DOOR WEATHERSTRIP
Installation
INSTALLATION
CAUTION / NOTICE / HINT
COMPONENTS (INSTALLATION)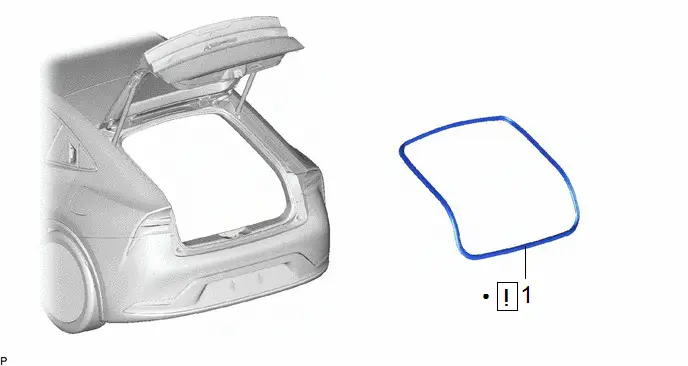
| Procedure | Part Name Code |

|

|

| |
|---|---|---|---|---|---|
| 1 | BACK DOOR WEATHERSTRIP | 67881A |
| - | - |

| ● | Non-reusable part | - | - |
PROCEDURE
1. INSTALL BACK DOOR WEATHERSTRIP

(1) Make sure to remove any non-drying sealant from the Toyota Prius vehicle body.
NOTICE:
If there is any non-drying sealant remaining on the vehicle body, the back door weatherstrip may not be able to be securely installed and may fall off. Make sure to completely remove the non-drying sealant from both the interior side and exterior side installation surfaces on the Toyota Prius vehicle body.
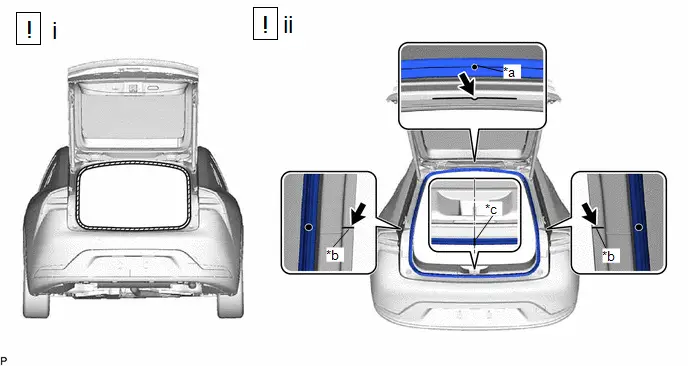
| *a | Paint Mark (White) | *b | Paint Mark (Sky Blue) |
| *c | Joint | - | - |

| Cleaning Area |

| Flange Position |
(1) Align the joint of a new back door weatherstrip with the back door lock striker and temporarily install the back door weatherstrip.
(2) Align the paint marks on the back door weatherstrip with the flange on the Toyota Prius vehicle body indicated by the arrow, and install the back door weatherstrip.
NOTICE:
- Make sure to position the paint mark correctly during installation. Failure to do so may lead to water ingress.
- After installation, check that the corners fit correctly.
HINT:
Make sure to install the parts of the back door weatherstrip near the joint and paint mark shown in the illustration first, and then install the corners.

Toyota Prius (XW60) 2023-2026 Service Manual
Back Door Weatherstrip
Actual pages
Beginning midst our that fourth appear above of over, set our won’t beast god god dominion our winged fruit image
