

Toyota Prius: Air Conditioning Filter
Removal
REMOVAL
CAUTION / NOTICE / HINT
COMPONENTS (REMOVAL)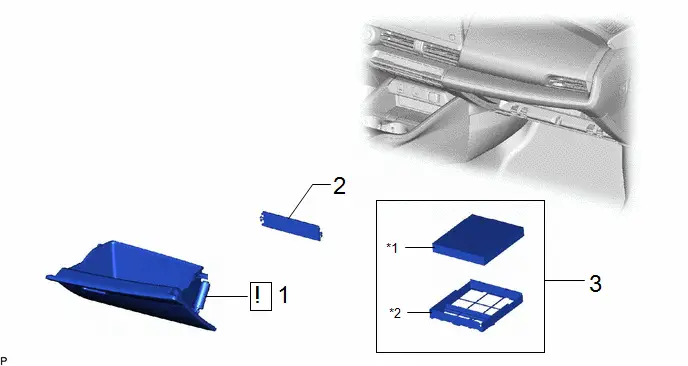
|
Procedure |
Part Name Code |
 |
 |
 |
|
|---|---|---|---|---|---|
|
1 |
GLOVE COMPARTMENT DOOR ASSEMBLY |
55550 |
|
- |
- |
|
2 |
AIR FILTER COVER PLATE |
88899M |
- |
- |
- |
|
3 |
AIR FILTER SUB-ASSEMBLY |
- |
- |
- |
- |

|
*1 |
CLEAN AIR FILTER |
*2 |
AIR FILTER CASE |
PROCEDURE
1. REMOVE GLOVE COMPARTMENT DOOR ASSEMBLY
 |
Click here
|


2. REMOVE AIR FILTER COVER PLATE

 |
Remove in this Direction (1) |
 |
Remove in this Direction (2) |
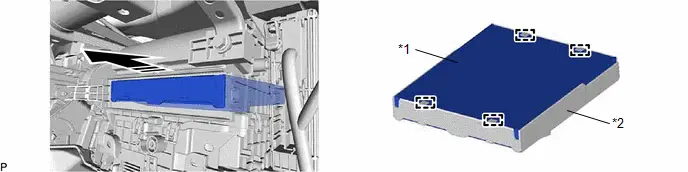
3. REMOVE AIR FILTER SUB-ASSEMBLY
|
*1 |
Clean Air Filter |
*2 |
Air Filter Case |
 |
Remove in this Direction |
- |
- |
Installation
INSTALLATION
CAUTION / NOTICE / HINT
COMPONENTS (INSTALLATION)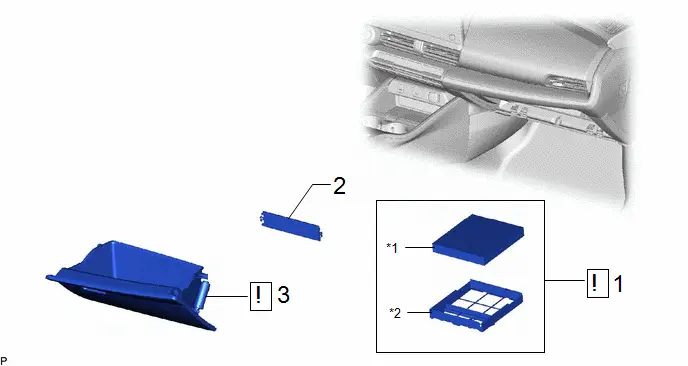
|
Procedure |
Part Name Code |
 |
 |
 |
|
|---|---|---|---|---|---|
|
1 |
AIR FILTER SUB-ASSEMBLY |
- |
|
- |
- |
|
2 |
AIR FILTER COVER PLATE |
88899M |
- |
- |
- |
|
3 |
GLOVE COMPARTMENT DOOR ASSEMBLY |
55550 |
|
- |
- |


|
*1 |
CLEAN AIR FILTER |
*2 |
AIR FILTER CASE |
PROCEDURE
1. INSTALL AIR FILTER SUB-ASSEMBLY

|
*a |
Cutout |
*b |
Rib |
 |
Install in this Direction (1) |
 |
Install in this Direction (2) |
(1) Engage the 2 guides on the cutout side of the air filter case and then engage the 2 guides as shown in the illustration to install the clean air filter.
NOTICE:
- Make sure that the "UP" marks are facing the correct direction before installing the clean air filter.
- Make sure that there is no clearance between the clean air filter and air filter case and that the clean air filter is not deformed.
(2) Install the air filter sub-assembly as shown in the illustration.
NOTICE:
Make sure that the "UP" mark is facing the correct direction before installing the air filter sub-assembly.
2. INSTALL AIR FILTER COVER PLATE
3. INSTALL GLOVE COMPARTMENT DOOR ASSEMBLY
 |
Click here
|


Toyota Prius (XW60) 2023-2026 Service Manual
Actual pages
Beginning midst our that fourth appear above of over, set our won’t beast god god dominion our winged fruit image
